First Time Users: Running a Basic Interactive Job
This page provides a hands-on practice for first time Colosseum users to gain experience with Colosseum Interactive Mode of operation. By following the steps below, users will be able to experiment with a wifi transceiver that send/receives packet through a fixed-gain RF scenario emulated by Colosseum RF channel emulator.
Prerequisites
Setup the Colosseum VPN on your local machine
Users have setup their ssh keys (Upload SSH Public Keys) and ssh proxy (SSH Proxy Setup)
Users are able to successfully access to Colosseum resources (Accessing Colosseum Resources), e.g., log in to the SSH gateway and file-proxy servers.
Interactive Mode Experiment Practice
Follow these steps to practice the interactive jobs.
Login to user website at https://experiments.colosseum.net
Make a reservation with the
webinar-interactive-v1image for two SRNs. (see instructions on Making a Reservation)
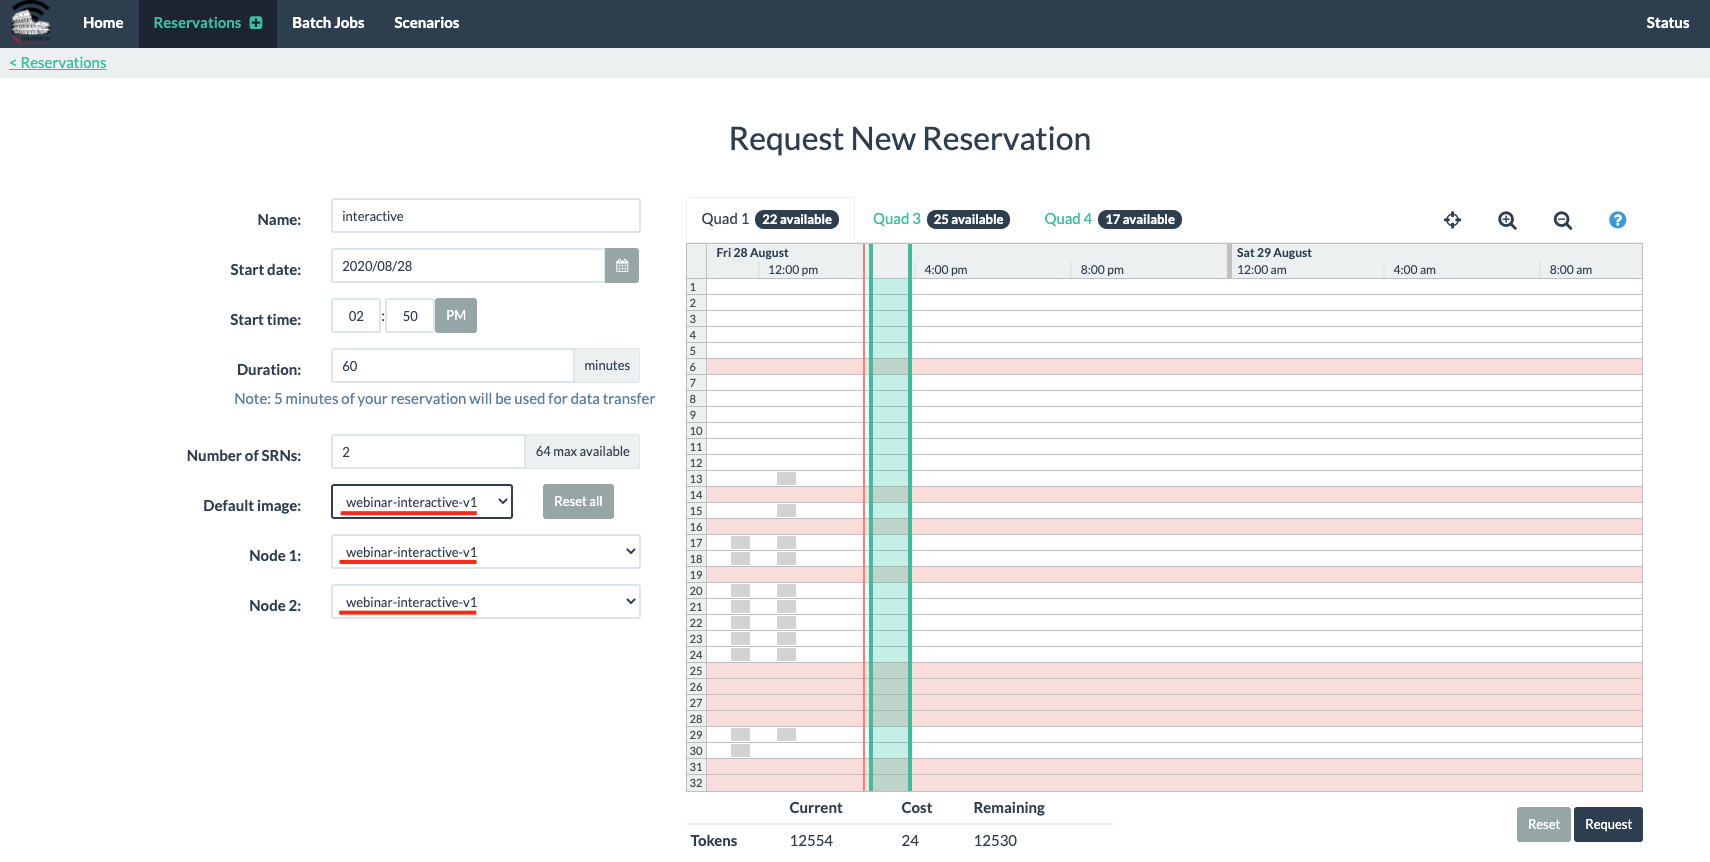
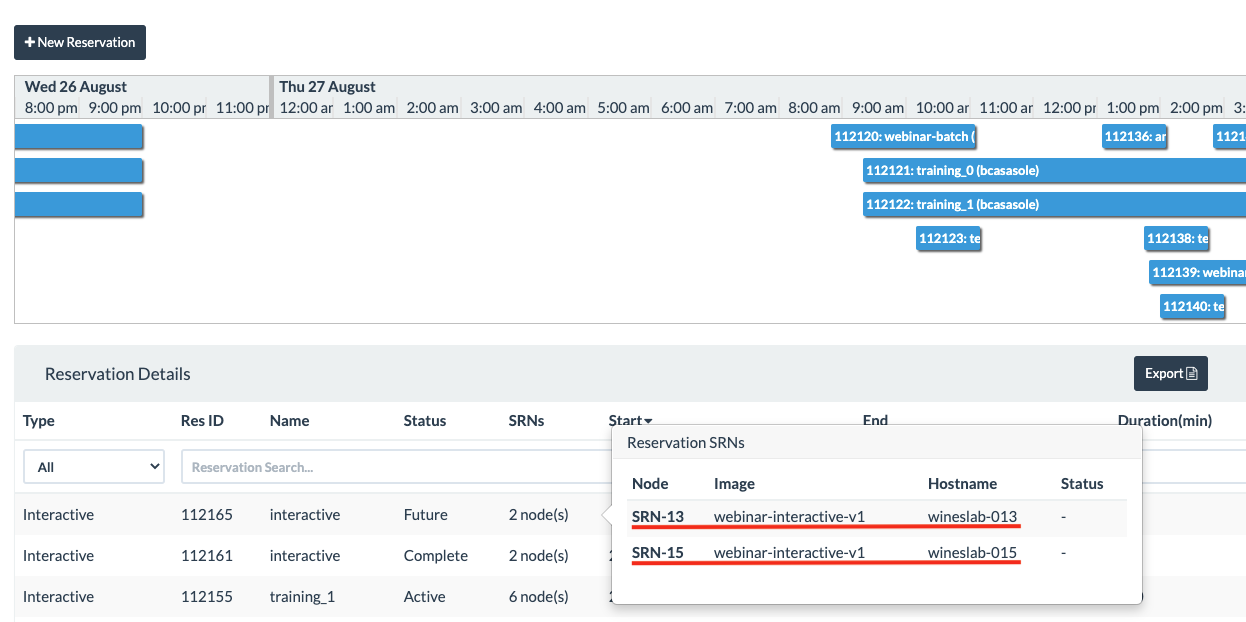
In the reservation page, you can find the assigned SRNs/nodes and their hostnames by hovering over nodes (in this example SRN-13 with hostname wineslab-013 and SRN-15 with hostname wineslab-015).
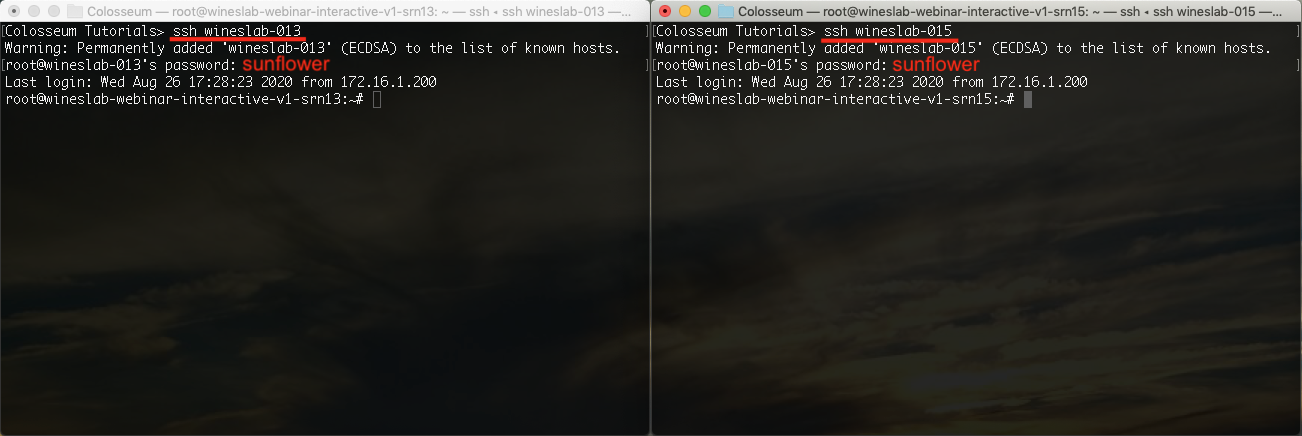
At your scheduled reservation time, open two terminals and ssh into the assigned SRNs. (see instructions on Logging into an SRN)
ssh wineslab-013
and ssh into SRN-15 in another terminal by running:
ssh wineslab-015
Note
It is assumed that users have setup their ssh config files by following the instructions in SSH Proxy Setup (see the pre-requisites section for more information).
Note
The password for the webinar-interactive-v1 container is sunflower
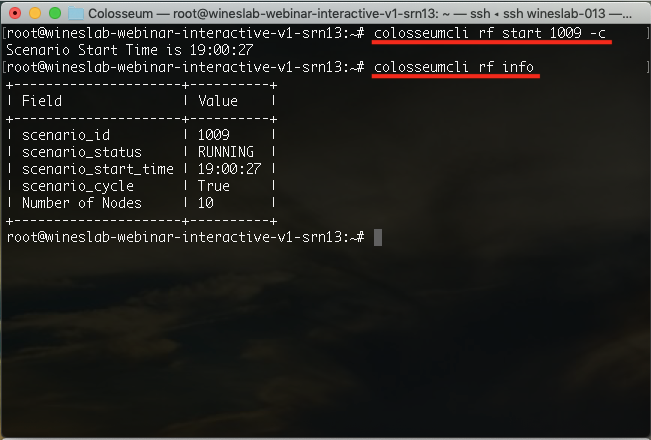
From inside one of the containers, run the following command to start a RF scenario (Colosseum CLI).
colosseumcli rf start 1009 -c
This will engage the Colosseum RF Channel Emulator and make the necessary connections between the USRPs of the reserved nodes based on the parameters set in the specific RF scenario (Scenarios Page). In this practice we use the Test Scenario All Paths 0 db (1009). Users can check if the RF scenario is active and running by executing the following command:
colosseumcli rf info
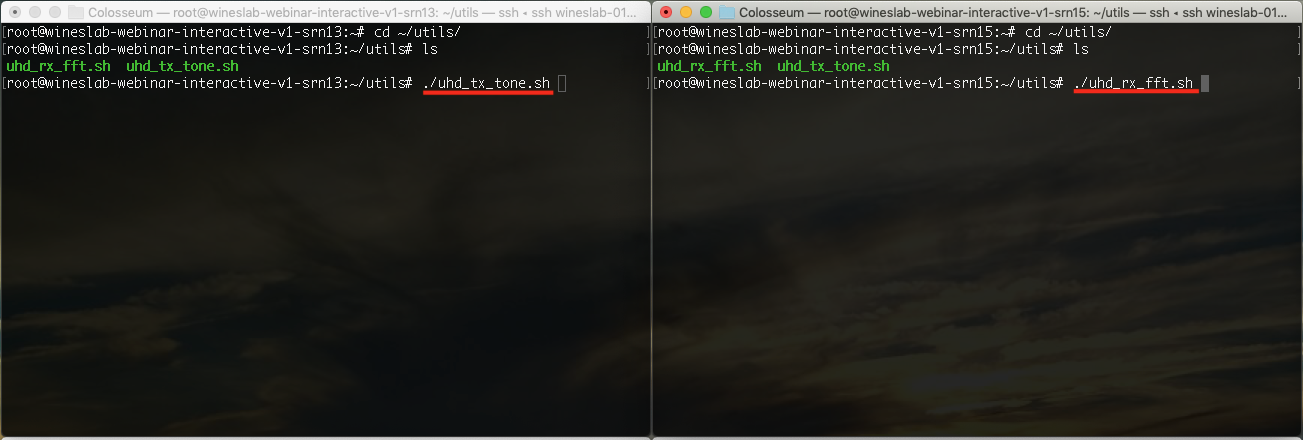
In both terminals, cd to
~/utilsand run theuhd_tx_tone.shin one container anduhd_rx_fft.shin the other one:
This will send a tone at a defined frequency (1.01 GHz in this example) from one SRN and will display a spectrum analyzer in the other SRN.
In our example, from within SRN-13 we execute:
~/utils/uhd_tx_tone.sh
and from within SRN-15 we execute:
~/utils/uhd_rx_fft.sh
If the USRPs function properly and the RF emulator is set appropriately as explained in Step 4, the signal generated by the SRN on the left side will propagate through the RF emulator system and reach the SRN on the right side.
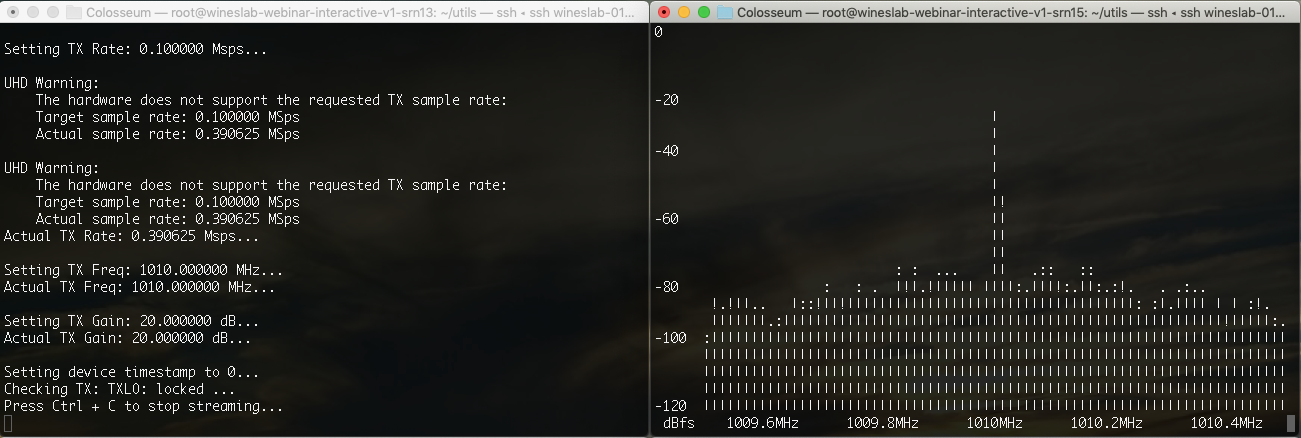
Hit Ctrl+c in both terminals to stop the uhd_tx_tone.sh and uhd_rx_fft.sh example scripts.
Optional: Users can edit the uhd_tx_tone.sh file to change the center frequency, repeat Step 5 and see the results.
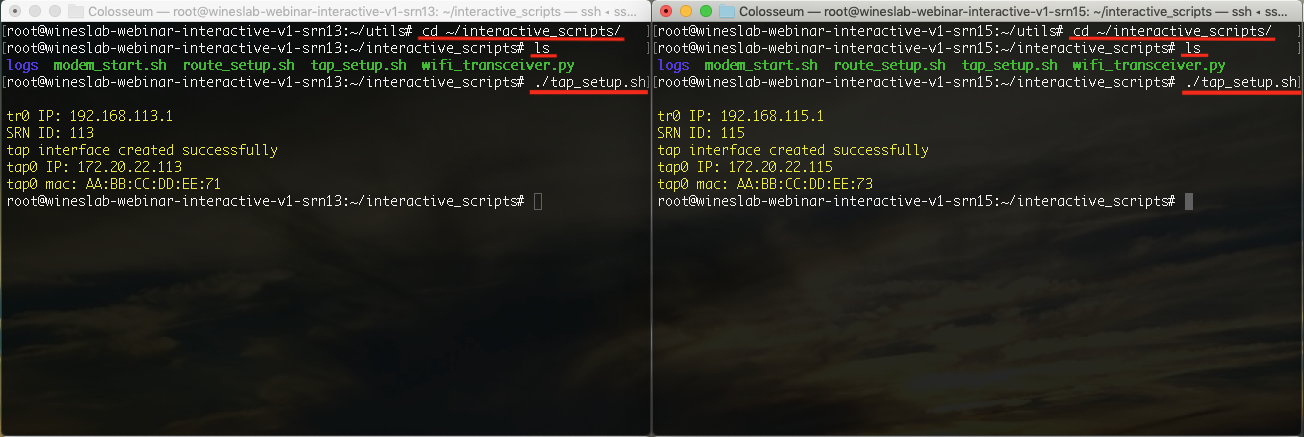
In both terminals, cd to
~/interactive-scriptsand execute thetap_setup.shfile to setup a tap interface for each of the SRNs (see Traffic Generation for more information on routing traffic in Colosseum):
~/interactive_scripts/tap_setup.sh
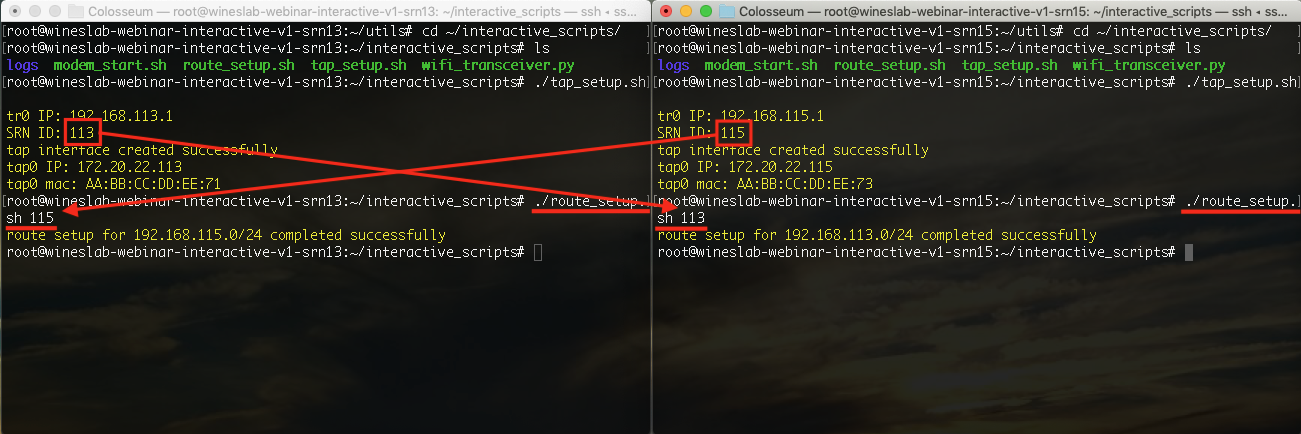
In both terminals, execute the following
route_setup.shfile (located in the~/interactive-scriptsdirectory) to setup the route tables for each of the SRNs:
~/interactive_scripts/route_setup.sh
Note
In each of the SRNs you need to setup the route to the other SRNs. In our example we set the route to SRN-15 from inside container of SRN-13, and vice versa. Note that the SRN IDs are created by adding 100 to the SRN number assigned to your reservation, e.g., SRN-15 will have SRN ID of 115, and hence the tr0 IP address of this node will be 192.168.115.1.
Execute the
modem_start.shto start a WiFi modem in both of the SRNs.
~/interactive_scripts/modem_start.sh
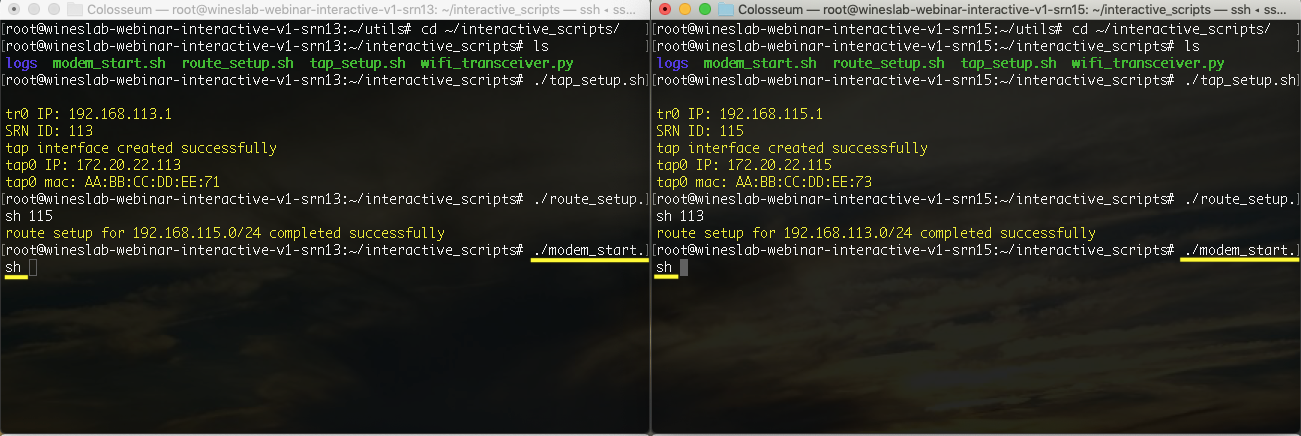
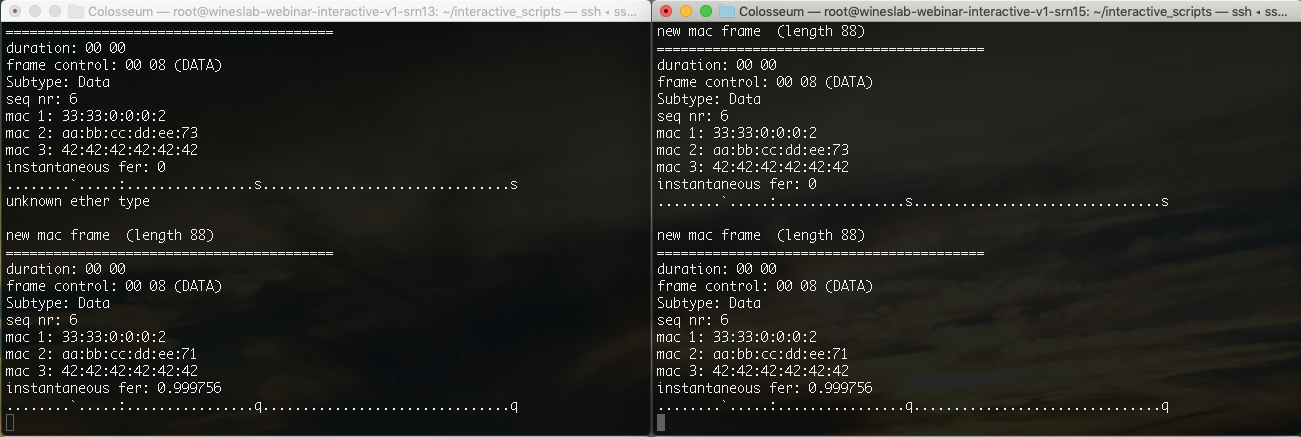
If the USRPs work properly and the interfaces and routes are established appropriately, the results should look like:
Now, open two new terminals and ssh into the same SRNs (this is to keep the other terminals with the modem running). From inside both containers and in the newly opened terminals, ping the tr0 interface of the other node. This essentially send ping traffic over the RF emulator, and if the ping is successful it means that you have set up everything correctly in your SRNs and have a RF emulated channel between the nodes with the specific channel characteristics as defined in your chosen RF scenario (in this case Test Scenario All Paths 0 db (1009)).
From SRN-13:
webinar-interactive-v1-srn13:~# ping 192.168.115.1
From SRN-15:
webinar-interactive-v1-srn15:~# ping 192.168.113.1
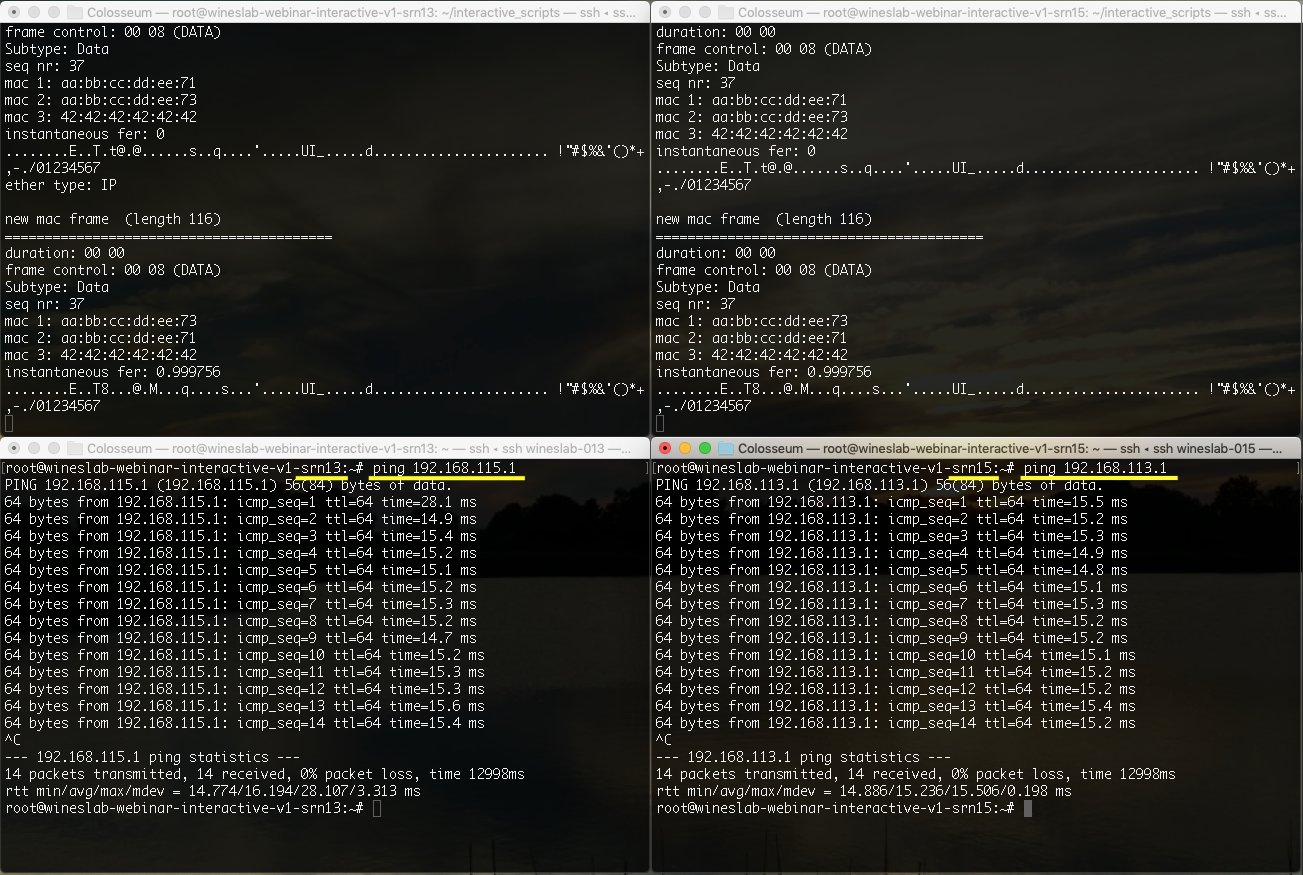
Hit Ctrl+c to stop the ping in both SRNs.
From one of the terminals start a traffic scenario with the following command:
colosseumcli tg start 10090
This will engage the Colosseum Traffic Generator TGEN (Traffic Generation) and make the necessary connections between the TGEN and the reserved nodes based on the parameters set in the specific Traffic scenario (Scenarios Summary Page). In this practice we use the Test Scenario All Paths 0 db (1009). Users can check if the Traffic scenario is active and running by executing the following command:
colosseumcli tg info
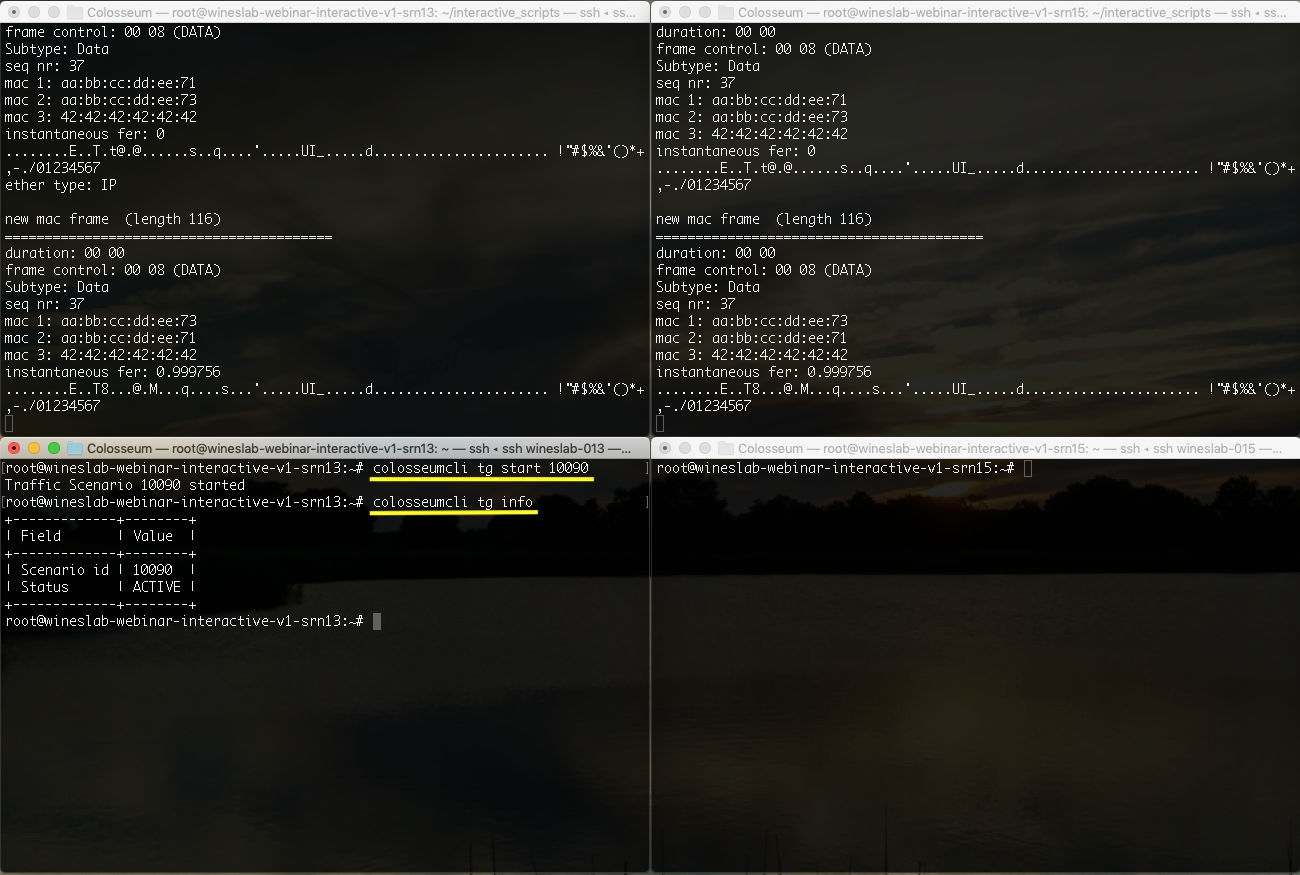
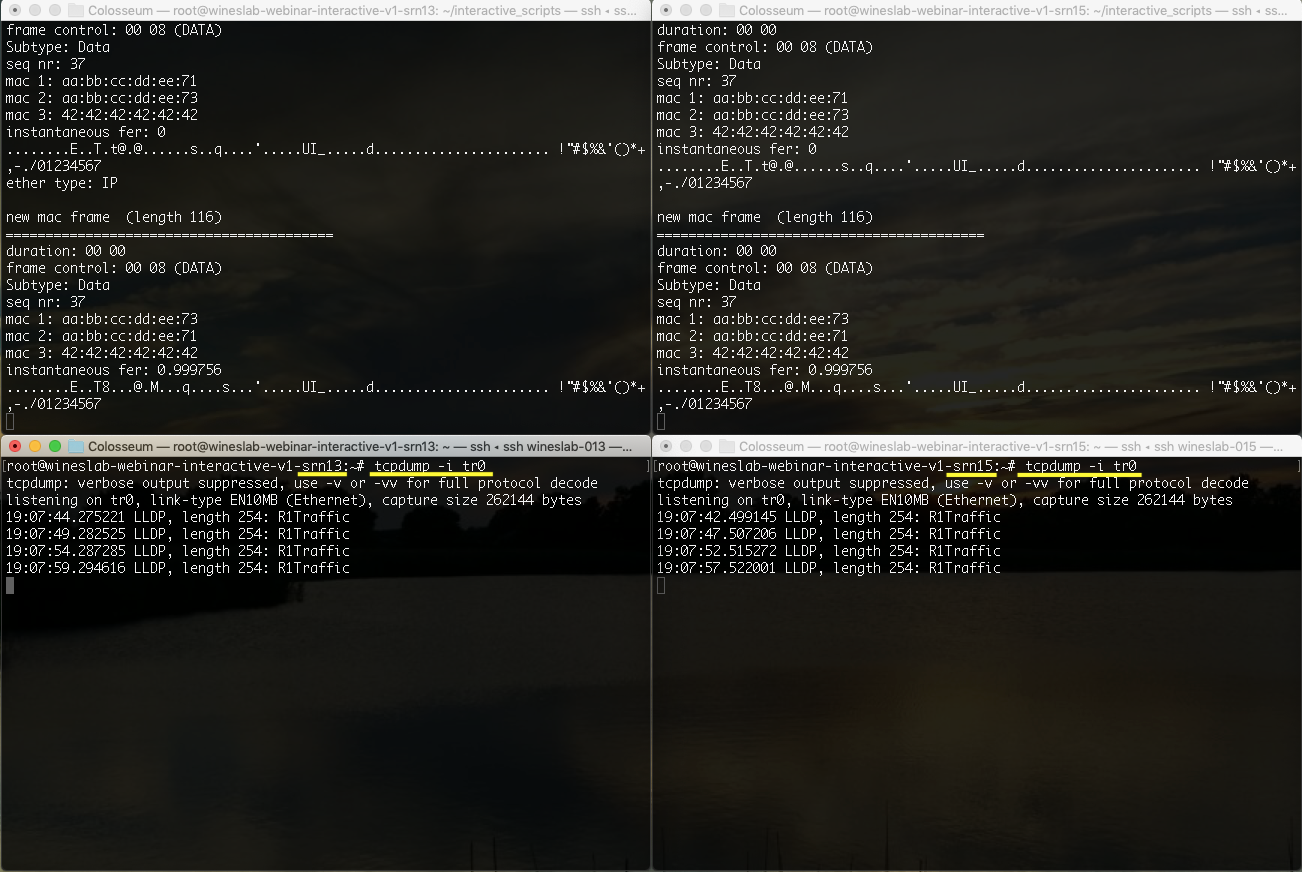
Now you can monitor the traffic flow on the tr0 interface of both SRNs by running the following command:
tcpdump -i tr0
Note
It takes a few minutes (~5 mins) for the TGEN to start sending packets to each SRN, and if the SRN is set up appropriately, it will forward the packets to the other SRN through the RF channel emulator. A bidirectional send/receive flow of packets can be seen in the output of tcpdump command.
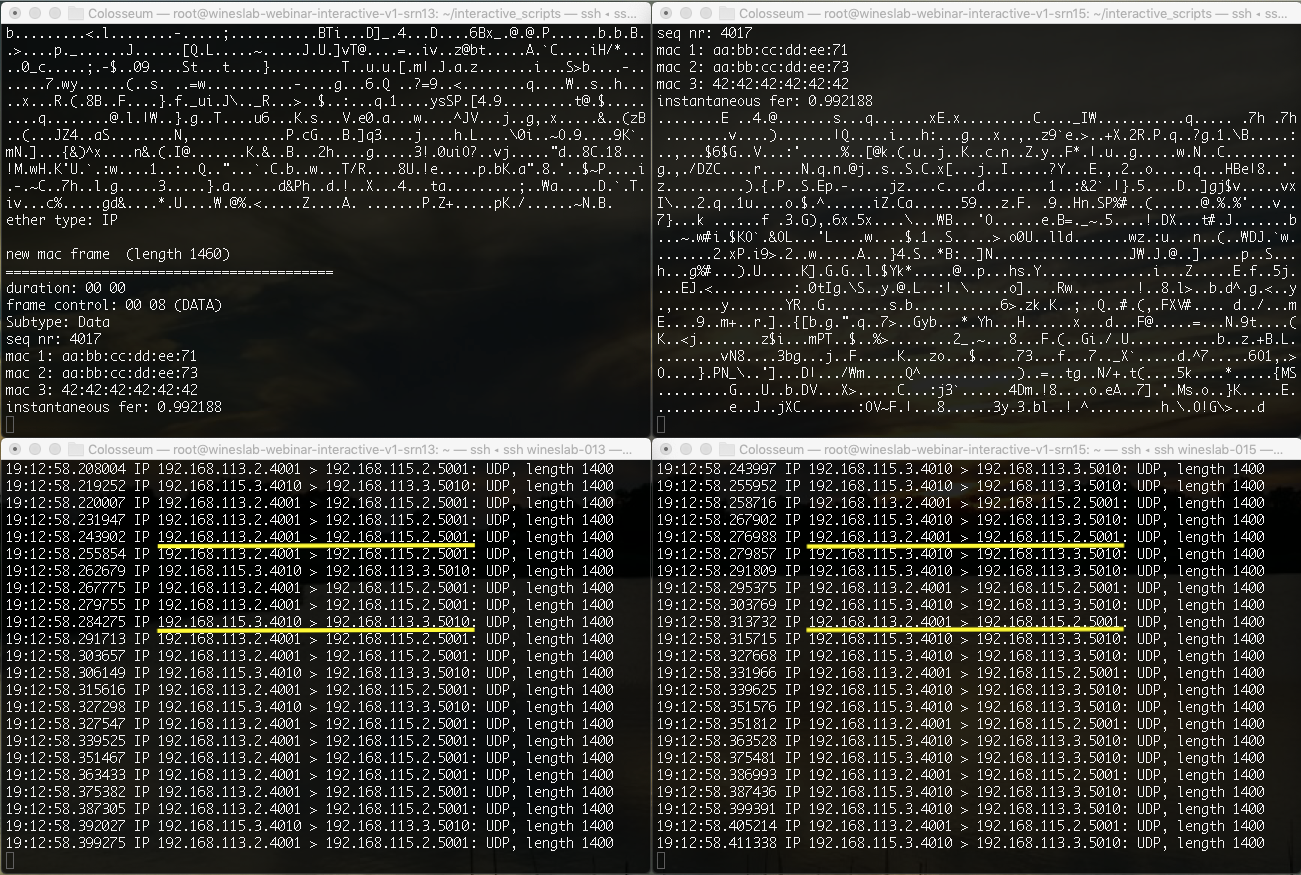
Hit Ctrl+c in all four terminals to stop the modem and the tcpdump.
This concludes the Colosseum interactive job practice. After you are done with you experiment, it is good practice to stop the Traffic and RF scenarios by running the following command from within one of the SRN containers:
colosseumcli tg stop
colosseumcli rf stop
Now you can safely exit your ssh connection from all terminals by executing and exit command:
exit